Friday, August 31, 2018

PyOpengl Cube_control

Pygame_openGL(初)


該怎麼去用Python去繪圖一個3D世界呢,終於來到這一天用CODE繪製3D畫面
先照哥的code跑一遍


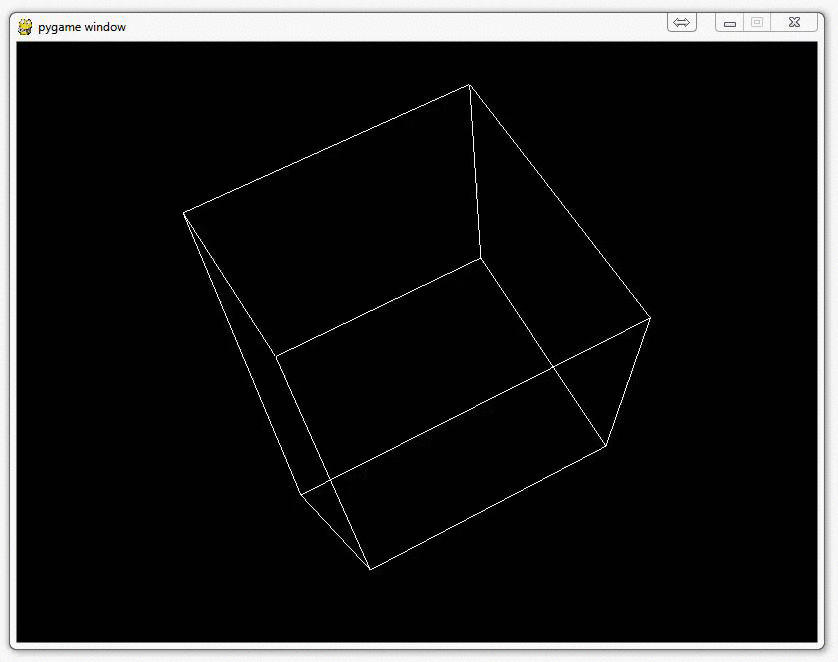
得到哥的畫面呢,假設實現minecraft創世神有可能嗎之類的
就開始找到目前為止的資料吧
初步構想呢我想為這個遊戲新增什麼東西呢
今天共新增了
這些在網路上超少,或許我對opengl關鍵字不夠熟悉關係,
不過還是可以透過其他語言控制opengl的code從其中找出關聯性
貼圖紋理和為這個世界加入音效,和顯示文字之類的東東
直接來上代碼吧
改裝後!用滾輪來調控速度

預計


徒手打造一個mmorpg,所以呢我們接下來我們可以來產生一個地面,讓腳色在cube行走,已經掌握貼圖後,我們可以再加入其他更多模型3dsmax骨架之類的,算了扯遠了,話說在座標還分很多種世界座標,視窗座標等等
終於了解數學不好不能寫遊戲惹,又不是說要編寫一個引擎(或許可能?!),光源阿之類的粒子特效,總而言之,有這個demo我們只要再加入碰撞效果,創建地圖的話我們就可以打造一個類似mmorpg,day1慢慢啃
import pygame
from pygame.locals import *
from OpenGL.GL import *
from OpenGL.GLUT import *
from OpenGL.GLU import *
import sys
import random
vertices = (
(1, -1, -1),
(1, 1, -1),
(-1, 1, -1),
(-1, -1, -1),
(1, -1, 1),
(1, 1, 1),
(-1, -1, 1),
(-1, 1, 1)
)
vertices2 = (
(-1.0,-1.0,1.0),
(1.0,-1.0,1.0),
(1.0,1.0,1.0),
(-1.0,1.0,1.0),
(-1.0,-1.0,-1.0),
(-1.0,1.0,-1.0),
(1.0,1.0,-1.0),
(1.0,-1.0,-1.0),
(-1.0,1.0,-1.0),
(-1.0,1.0,1.0),
(1.0,1.0,1.0),
(1.0,1.0,-1.0),
(-1.0,-1.0,-1.0),
(1.0,-1.0,-1.0),
(1.0,-1.0,1.0),
(-1.0,-1.0,1.0),
(1.0,-1.0,-1.0),
(1.0,1.0,-1.0),
(1.0,1.0,1.0),
(1.0,-1.0,1.0),
(-1.0,-1.0,-1.0),
(-1.0,-1.0,1.0),
(-1.0,1.0,1.0),
(-1.0,1.0,-1.0),
)
edges = (
(0,1),
(0,3),
(0,4),
(2,1),
(2,3),
(2,7),
(6,3),
(6,4),
(6,7),
(5,1),
(5,4),
(5,7)
)
surfaces = (
(0,1,2,3),
(3,2,7,6),
(6,7,5,4),
(4,5,1,0),
(1,5,7,2),
(4,0,3,6)
)
colors = (
(1,0,0),
(0,1,0),
(0,0,1),
(0,1,0),
(1,1,1),
(0,1,1),
(1,0,0),
(0,1,0),
(0,0,1),
(1,0,0),
(1,1,1),
(0,1,1),
)
txcolors = (
(1.0,0.0),
(0.0,1.0),
(1.0,1.0),
(1.0,0.0),
(0.0,0.0),
)
speed=0.50
##ground_vertices = (
## (-10, -1.1, 20),
## (10, -1.1, 20),
## (-10, -1.1, -300),
## (10, -1.1, -300),
## )
##
##
##def ground():
## glBegin(GL_QUADS)
## for vertex in ground_vertices:
## glColor3fv((0,0.5,0.5))
## glVertex3fv(vertex)
##
## glEnd()
def set_vertices(max_distance, min_distance = -20):
x_value_change = random.randrange(-10,10)
y_value_change = random.randrange(-10,10)
z_value_change = random.randrange(-1*max_distance,min_distance)
new_vertices = []
for vert in vertices:
new_vert = []
new_x = vert[0] + x_value_change
new_y = vert[1] + y_value_change
new_z = vert[2] + z_value_change
new_vert.append(new_x)
new_vert.append(new_y)
new_vert.append(new_z)
new_vertices.append(new_vert)
return new_vertices
def loadTexture():
textureSurface = pygame.image.load('brick.png')
textureData = pygame.image.tostring(textureSurface, "RGBA", 1)
width = textureSurface.get_width()
height = textureSurface.get_height()
#深度開啟
glEnable(GL_DEPTH_TEST);
#
glEnable(GL_TEXTURE_2D)
texid = glGenTextures(1)
glBindTexture(GL_TEXTURE_2D, texid)
glTexImage2D(GL_TEXTURE_2D, 0, GL_RGB, width, height,
0, GL_RGBA, GL_UNSIGNED_BYTE, textureData)
glTexParameterf(GL_TEXTURE_2D, GL_TEXTURE_WRAP_S, GL_REPEAT)
glTexParameterf(GL_TEXTURE_2D, GL_TEXTURE_WRAP_T, GL_REPEAT)
glTexParameterf(GL_TEXTURE_2D, GL_TEXTURE_MAG_FILTER, GL_NEAREST)
glTexParameterf(GL_TEXTURE_2D, GL_TEXTURE_MIN_FILTER, GL_NEAREST)
return texid
def Cube(vertices):
# glBegin(GL_QUADS)
# for surface in surfaces:
# x = 0
# for vertex in surface:
# x+=1
# glColor3fv(colors[x])
# glVertex3fv(vertices[vertex])
# glEnd()
glBegin(GL_QUADS)
for surface in surfaces:
x = 0
for vertex in surface:
x+=1
# glTexCoord2fv(0.0,0.0)
# glVertex3fv(-1.0,-1.0,1.0)
glTexCoord2fv(txcolors[x])
#glColor3fv(colors[x])
glVertex3fv(vertices[vertex])
glEnd()
#
# print(vertices.rotation)
# glPopMatrix()
# vertices.rotation[0] = vertices.rotation[0] + 1
# glBegin(GL_QUADS)
# glTexCoord2f(0.0,0.0)
# glVertex3f(-1.0,-1.0,1.0)
# glTexCoord2f(1.0,0.0)
# glVertex3f(1.0,-1.0,1.0)
# glTexCoord2f(1.0,1.0)
# glVertex3f(1.0,1.0,1.0)
# glTexCoord2f(0.0,1.0)
# glVertex3f(-1.0,1.0,1.0)
# glTexCoord2f(1.0,0.0)
# glVertex3f(-1.0,-1.0,-1.0)
# glTexCoord2f(1.0,1.0)
# glVertex3f(-1.0,1.0,-1.0)
# glTexCoord2f(0.0,1.0)
# glVertex3f(1.0,1.0,-1.0)
# glTexCoord2f(0.0,0.0)
# glVertex3f(1.0,-1.0,-1.0)
# glTexCoord2f(0.0,1.0)
# glVertex3f(-1.0,1.0,-1.0)
# glTexCoord2f(0.0,0.0)
# glVertex3f(-1.0,1.0,1.0)
# glTexCoord2f(1.0,0.0)
# glVertex3f(1.0,1.0,1.0)
# glTexCoord2f(1.0,1.0)
# glVertex3f(1.0,1.0,-1.0)
# glTexCoord2f(1.0,1.0)
# glVertex3f(-1.0,-1.0,-1.0)
# glTexCoord2f(0.0,1.0)
# glVertex3f(1.0,-1.0,-1.0)
# glTexCoord2f(0.0,0.0)
# glVertex3f(1.0,-1.0,1.0)
# glTexCoord2f(1.0,0.0)
# glVertex3f(-1.0,-1.0,1.0)
# glTexCoord2f(1.0,0.0)
# glVertex3f(1.0,-1.0,-1.0)
# glTexCoord2f(1.0,1.0)
# glVertex3f(1.0,1.0,-1.0)
# glTexCoord2f(0.0,1.0)
# glVertex3f(1.0,1.0,1.0)
# glTexCoord2f(0.0,0.0)
# glVertex3f(1.0,-1.0,1.0)
# glTexCoord2f(0.0,0.0)
# glVertex3f(-1.0,-1.0,-1.0)
# glTexCoord2f(1.0,0.0)
# glVertex3f(-1.0,-1.0,1.0)
# glTexCoord2f(1.0,1.0)
# glVertex3f(-1.0,1.0,1.0)
# glTexCoord2f(0.0,1.0)
# glVertex3f(-1.0,1.0,-1.0)
# glEnd()
glBegin(GL_LINES)
for edge in edges:
glColor3fv((1, 1, 1))
for vertex in edge:
glVertex3fv(vertices[vertex])
glEnd()
def DrawText( string):
# 循环处理字符串
for c in string:
# 输出文字
glutBitmapCharacter(GLUT_BITMAP_8_BY_13, ord(c))
def main():
global speed
pygame.mixer.init()
glutInit(sys.argv)
pygame.init()
# pygame.mixer.music.load("1.mp3")
# pygame.mixer.music.play(-1,0.0)
display = (800,600)
screen=pygame.display.set_mode(display, pygame.DOUBLEBUF | pygame.OPENGL | pygame.OPENGLBLIT)
#loadTexture2()
max_distance = 100
gluPerspective(45, (display[0]/display[1]), 0.1, max_distance)
glTranslatef(random.randrange(-5,5),random.randrange(-5,5), -40)
#object_passed = False
x_move = 0
y_move = 0
#这句话总是可以的,所以还是TTF文件保险啊
cube_dict = {}
loadTexture()
glColor3f(0.0, 1.0, 0.0)
for x in range(5):
cube_dict[x] =set_vertices(max_distance)
#glRotatef(25, 2, 1, 0)
while True:
for event in pygame.event.get():
if event.type == pygame.QUIT:
pygame.quit()
quit()
if event.type == pygame.KEYDOWN:
if event.key == pygame.K_LEFT:
x_move = 0.3
if event.key == pygame.K_RIGHT:
x_move = -0.3
if event.key == pygame.K_UP:
y_move = -0.3
if event.key == pygame.K_DOWN:
y_move = 0.3
# if event.type == pygame.MOUSEMOTION:
# mouse_position = pygame.mouse.get_pos()
# if(mouse_position[0]<(1280/2)):
# x_move = 0.9
# if(mouse_position[0]>(1280/2)):
# x_move = -0.9
# if(mouse_position[1]<(768/2)):
# y_move = -0.9
# if(mouse_position[1]>(768/2)):
# y_move = 0.9
if event.type == pygame.MOUSEBUTTONDOWN:
if event.button == 4:
speed+=0.05
if event.button == 5:
speed-=0.05
if event.type == pygame.KEYUP:
if event.key == pygame.K_LEFT or event.key == pygame.K_RIGHT:
x_move = 0
if event.key == pygame.K_UP or event.key == pygame.K_DOWN:
y_move = 0
#pygame.display.update()
x = glGetDoublev(GL_MODELVIEW_MATRIX)
camera_x = x[3][0]
camera_y = x[3][1]
camera_z = x[3][2]
# print (camera_x)
# print (camera_y)
# print (camera_z)
glClear(GL_COLOR_BUFFER_BIT|GL_DEPTH_BUFFER_BIT)
#move
glTranslatef(x_move,y_move,speed)
# glRasterPos3f(- camera_x , - camera_y , camera_z-10)
glWindowPos2i(0,0 );
DrawText("x:"+str(camera_x)+" y:"+str(camera_y)+" z:"+str(camera_z))
# glWindowPos2i(0,0 );
# glutBitmapCharacter(GLUT_BITMAP_8_BY_13, ord(u'A'))
# glRasterPos3f( 0.0 , 1.0 , camera_z-10)
# print (camera_x)
# print (camera_y)
# print (camera_z)
# #glRasterPos2f(0,0)
# glutBitmapCharacter(GLUT_BITMAP_8_BY_13, ord(u'A'))
#ground()
for each_cube in cube_dict:
Cube(cube_dict[each_cube])
for each_cube in cube_dict:
if camera_z <= cube_dict[each_cube][0][2]:
print("passed a cube")
#delete_list.append(each_cube)
new_max = int(-1*(camera_z-max_distance))
cube_dict[each_cube] = set_vertices(new_max,int(camera_z))
# if camera_z <= cube_dict[each_cube][0][2]:
# if camera_x <= cube_dict[each_cube][0][0]:
# if camera_y <= cube_dict[each_cube][0][1]:
# print ("crack")
pygame.display.flip()
#pygame.time.wait(1)
main()
pygame.quit()
quit()
view raw pygame.py hosted with ❤ by GitHub


個別物件進行翻轉的時候應該用投影矩陣類似的東西,有趣的是發現原來遊戲世界的周圍
是可能用
持續修練,爆肝QQ

參考


https://www.cs.pu.edu.tw/~tsay/course/cg/tutorial/install.html
http://user.xmission.com/~nate/glut.html
https://github.com/stef/swram-opengl/blob/master/swram-opengl.py
https://stackoverflow.com/questions/46796459/how-to-install-glut-on-anaconda-on-windows
https://github.com/elisehuard/game-in-haskell/issues/1
https://blog.csdn.net/wangdingqiaoit/article/details/52506893